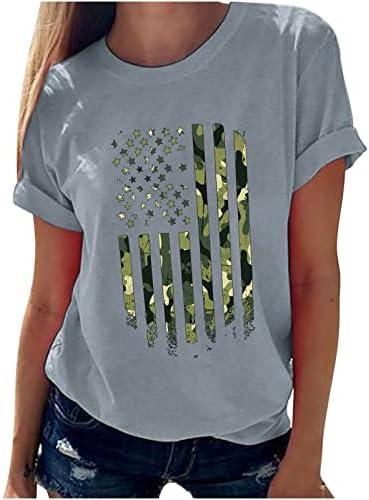
2023 Tricou cu bluză grafică pentru magazinele pentru femei Tricou cu bluză scurtă ✈✈✈Delivery : de obicei 714 zile lucrătoare ღ❤ Orice problemă de prodtransport pls ne trimi
Regresare.
Clasificare:

plastic Făcut în SUA sau importat Material : Acest suport amuzant de telefon mobil este din plastic, rezistent și durabil, ușor de transportat, spațiu mic, eliberați vă mâinile, ușo

Excelent pentru fierberea sau aburirea scoicilor, stridii, raci / raci, crab, homar, creveți, crustacee și alte fructe de mare; De asemenea, utilizabil pentru gătirea legumelor precum cea
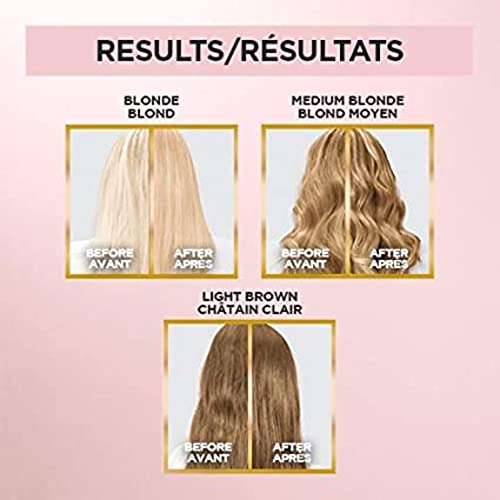
Luciu tonifiant pentru părul blond cald : acest toner îmbunătățește tonurile calde, aurii în părul blond natural, evidențiat sau decolorat, sporește strălucirea și condițiile pr

Coaseți pe aplicații de florirealist și rafinat, vă va face să atrăgeți și eleganți Patchuri de îmbrăcăminte cu sclipicio modalitate excelentă de ați exprima individualitatea,
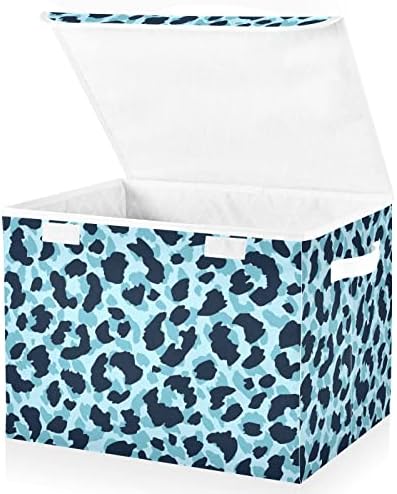
Pânză de oxford Material : 300 D Oxford Pânză+carton, puternic și durabil Dimensiune : 16,5 "H x 12.6" W x 11.8 "D Capacitate mare vă poate îndeplini diferitele cerințe de depozitare
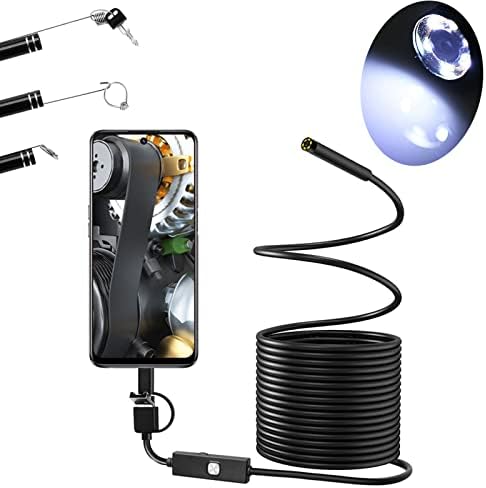
Compatibil cu 99% telefon Android și PC, notă importantă : este aplicabil doar pentru smartphoneul USB C cu funcție OTG și USB UVC 1,3 milioane de camere pixEl Super HiVision Capturați
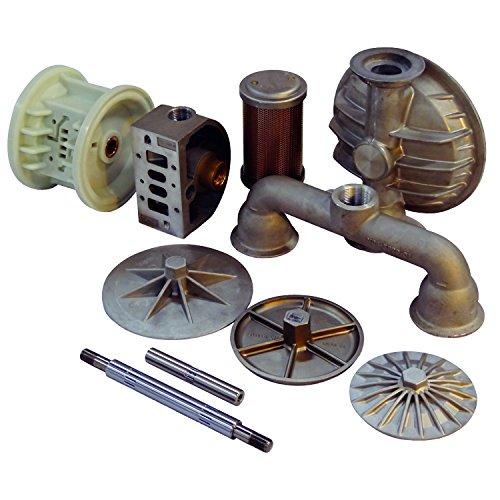
Scăderea pieselor de schimb pentru producătorii de pompe AODD de top Piese de înaltă calitate la costuri reduse Inventar de piese mari disponibile Extinderea listei de piese de pompă AO
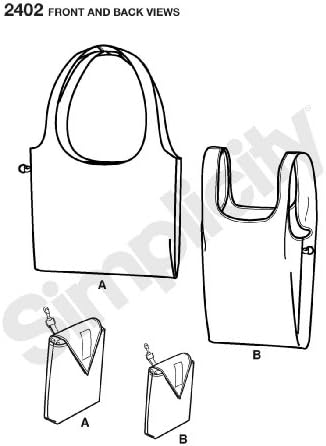
Este atât de ușor de cumpărături în dimensiuni OS (o dimensiune), model de simplitate 2402 Numărul de aspect incluse : 2 Proiectat și fabricat în The USA Este atât de ușor de cump�
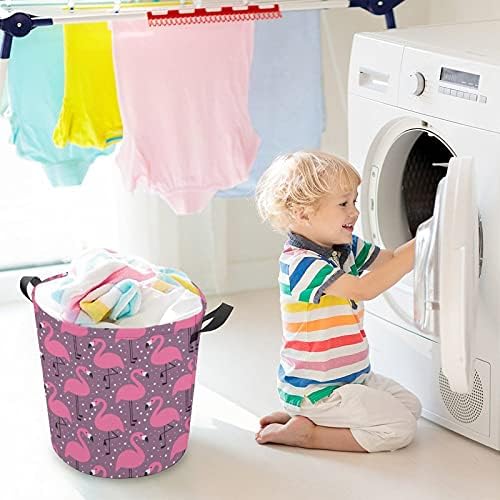
Geantă de rufe Flamingo cu mânere coș rotund de depozitare impermeabil Coș pliabil 16,5 x 17,3 Inch
RON 0.33
Pânză Oxford Ce pot obține?Veți avea o dimensiune de sac de rufe este de 16,5 x 17,3 inch / 42 x 44 cm.Dimensiunea împiedică este mare și poate stoca o mulțime de lucruri Din ce e f�
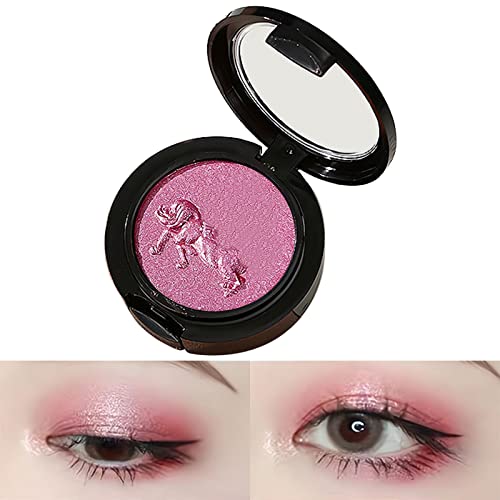
Acest Fard De Ochi Plattet Din Material, Nu Ar Irita Pielea Culori de lungă durată și nu este ușor să scadă și să zboare pulbere Combinația Rezonabilă De Culori, Umbrele Foarte Pig

Panou de ușă cu lumină interioară cu LEDuri premium de 8 ori mai luminos decât lumina stocului, construit cu cipuri LED de înaltă luminozitate 100% avansate, cu putere de iluminare de
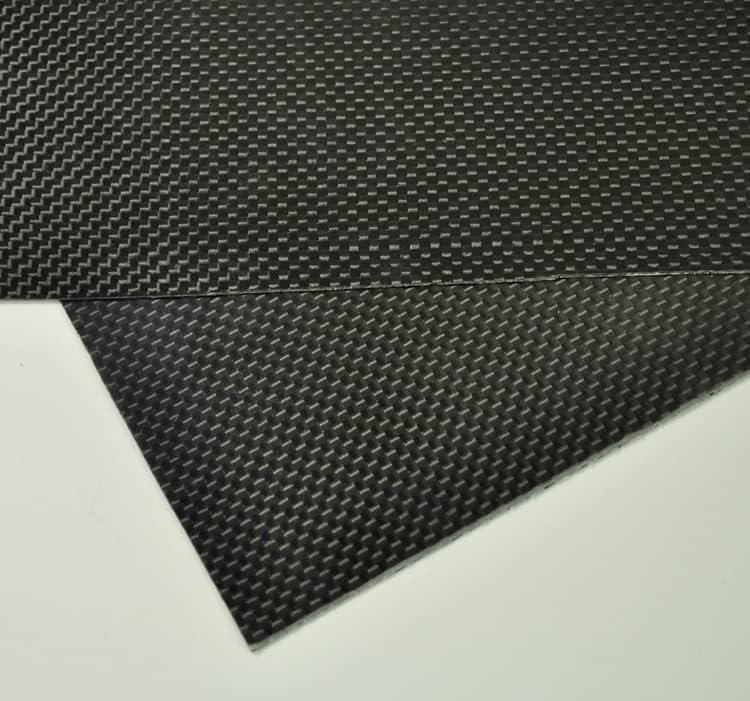
200x250x1mm placă din fibră de Carbon foaie de panou 3k țesătură simplă suprafață lucioasă ridicată
RON 1.33
Pentru tipul de vehicul : avioane Periferice / dispozitive cu telecomandă : placă din fibră de carbon Upgrade piese / accesorii : placă din fibră de Carbon Piese Rc & accs : axa princ

>> Materiale modernizate de înaltă calitate, mai durabile Instalarea nedistructivă este simplă și rapidă, iar performanța este mai stabilă Aspectul este conceput cu atenție pentru a
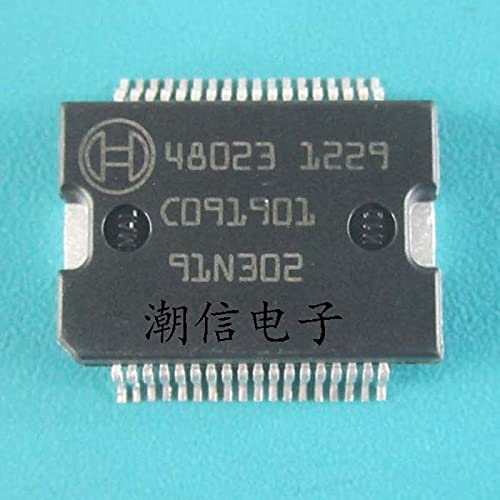
Originea : CN (origine) CONDIȚIE : NOU Tip : regulator de tensiune Numărul modelului : 0 Originea : CN (origine) CONDIȚIE : NOU Tip : regulator de tensiune Numărul modelului : 0 Dragi pr
100% Poliester Importat Închidere de remiză Spălare de mașini Capac de lucru cu butoane și benzi de transpirație Capacele noastre de lucru sunt proiectate cu butoane pe ambele cap pen
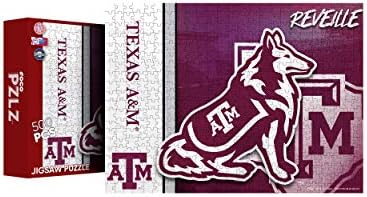
Licențiat Oficial Dimensiuniaproximativ 22 in x 17 în când este complet asamblat Recomandat pentru vârsta de 12 ani și peste Piese de puzzle tăiate cu precizie pentru o potrivire perfe
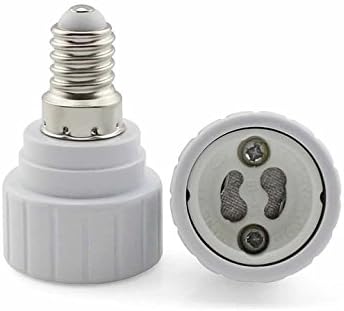
100% nou și de înaltă calitate Tip : E14 la GU10 lampă de lumină Becuri adaptor convertor Ușor de utilizat, nu este nevoie de instrumente pentru a instala, doar înșurubarea în priz�
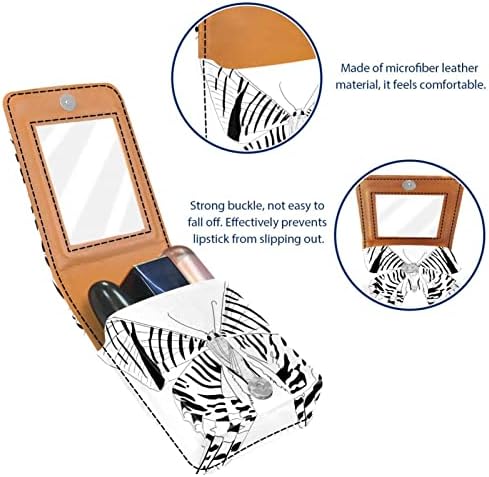
Dimensiune : 3.7" x 2.7" x 0.8 " (9.5, 7, 2 cm), poate conține 3 rujuri scurte Material : fabricat din piele faux din microfibră pentru o senzație confortabilă a mâinii...
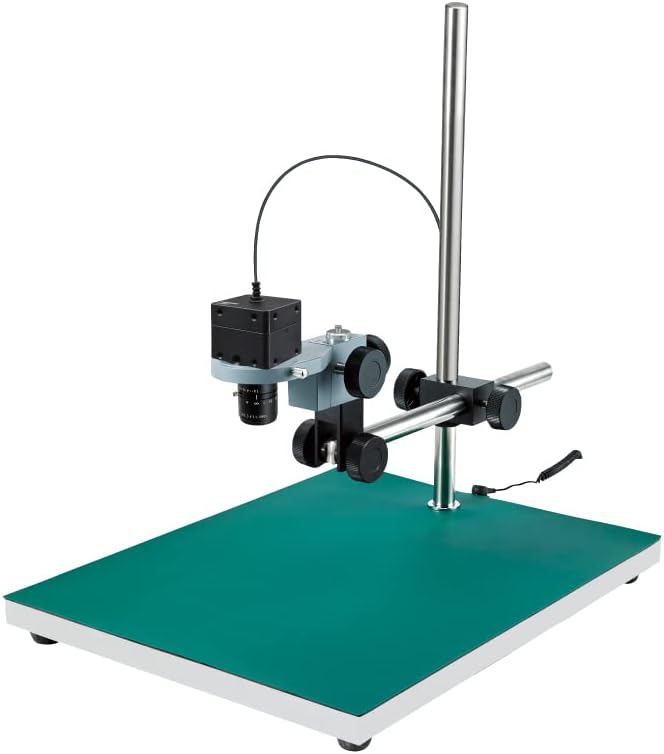
Este posibil ca garanția producătorului să nu se aplice Mărirea camerei : 0,615x câmp vizual atunci când utilizați camera : 10,0 x 7,6 1,8 x 1,3 inci (257 x 193 45 x Distanța de lu